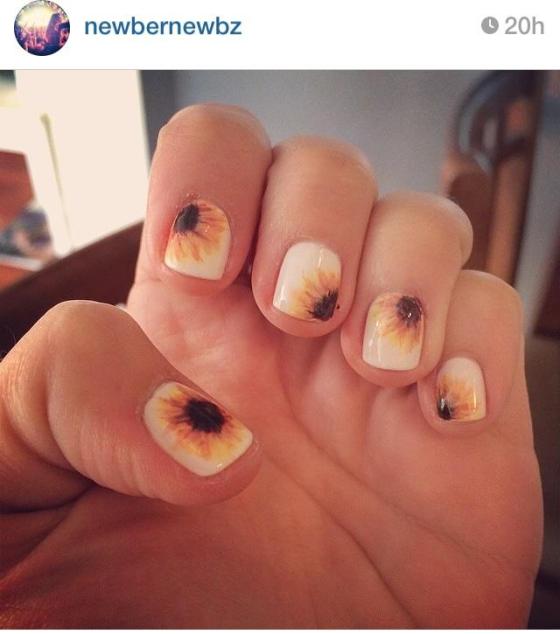
Spring is in full bloom! We love this DIY we spotted on our West Coast gal pal, Amanda’s Instagram (@NewberNewbz), so we asked her to share her secrets to perfecting this sunny manicure.

START WITH THE BASE
-
Apply 2 coats of the CND VINYLUX Weekly Polish and let dry before beginning your sunflowers.
If you are just looking for a solid white manicure for sunny days ahead, Amanda said the CND will last about a week on its own. She also swears by the Seche Vite Dry Fast Top coat, saying it gives her a gel-like shine and a chip-free manicure longer than any other top coat she has tried.
Apply top coat after completing your sunflowers (see below for more), and in just minutes you will be good to go!
FLOWER POWER:
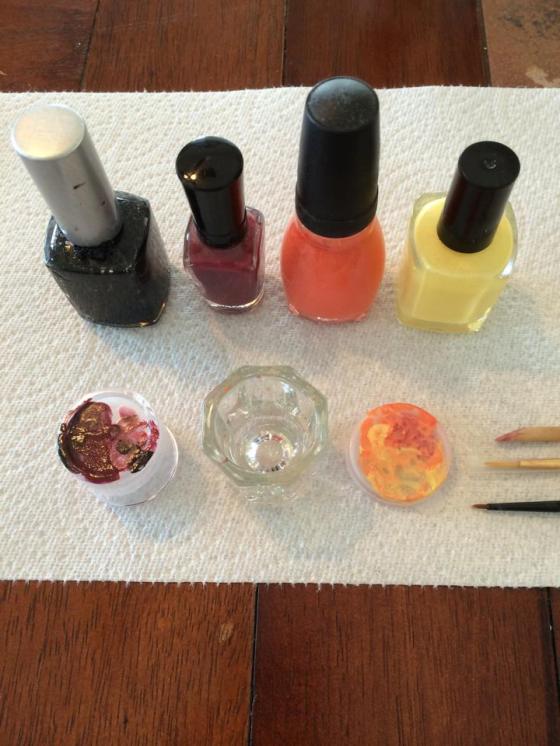
Here is the basic color palette needed to complete your sunflowers.
-
From left to right you will need a black, dark red, orange, and pale yellow polish.
You can pick up any of these colors at your local drug store, and don’t worry about the brand (the cheaper, the better). The orange and the yellow will be used for the petals, and the dark red and black will be used for the centers.
-
You will also need a toothpick (or nail art stick), a couple of micro paintbrushes (or nail art brushes), plastic lids for mixing colors, and a small bowl of acetate.
-
Focus on one nail at a time. With each nail, start by creating the petals of the flowers in the light yellow color. When the yellow is still slightly wet, dip one of your micro brushes in the acetone and then the orange to layer the colors. You can even swirl a bit of both the yellow and the orange on one of the plastic lids and go back in with a micro brush for more shading. Get creative!
-
Once all of your petals are completed, go back in to paint the centers in black. Using the toothpick, create the fuzzy edges between the center and the petals. Then, use the acetone in the same way as the petals, but this time by shading the dark red in with the black. You can even take the micro brush and layer some dark red spots in the very center of the flowers for some depth.
-
Lastly, clean one of your micro brushes of all paint, wet it with the acetone, and gently swipe your brush from the middle of the flower towards the outer edge of the petals, dragging a tinge of the darker hues from the center outwards to blend everything and add realism.
Finish with a top coat of the Seche Vite Dry Fast Top coat and let the sunshine in!
If your toes need some DIY love too, try a few of our favorites from the queen of fabulous pedicures, Goldfish Kiss: Springy Cherry Blossoms or Summery Pineapple toes.

And thank you again, Amanda, for contributing the pictures and instructions for the DIY. She’s the pretty lady on the left; we were so happy to bump into her a few weekends ago at Coachella!
Xx, E & S
